Today I’ll show you how to turn your KitchenAid mixer into a high-torque, stationary disc sander.
Quick Resources:
- YouTube video: https://youtu.be/vbJvURlSU44
- Instructable:
https://www.instructables.com/id/KitchenAid-Benchtop-Disc-Sander - Thingiverse Files: https://www.thingiverse.com/thing:3507813
For quite some time, I’ve argued that the workshop is missing a particular tool: a low speed, high torque, stationary disc sander. Stationary disc sanders are typically fast.
What’s the problem with fast?
High speed sanding burns end grain and melts thermoplastics. That’s the problem with fast.

Benefits of a Slow Speed Sander
- Allows greater finesse
- Won’t remove too much material at once
- Won’t burn end grain
- Won’t melt thermoplastics
Benefits of a Slow Speed, High Torque Sander
- Allows greater finesse
- Won’t remove too much material at once
- Won’t burn end grain
- Won’t melt thermoplastics
- Allows aggressive sanding/cutting by use of force rather than speed.
Benefits of a Slow Speed, High Torque, Stationary Sander
- Allows greater finesse
- Won’t remove too much material at once
- Won’t burn end grain
- Won’t melt thermoplastics
- Allows aggressive sanding/cutting by use of force rather than speed.
- Provides far greater control over the item being held
- Enables sanding to be a wildly useful part of the custom sculpting process
The KitchenAid Mixer is the Perfect Shop Tool
The KitchenAid mixer has the perfect motor for the job, and it’s a common item found in many homes across America. Here’s why it’s the perfect tool to turn into a slow speed disc sander:
- Strong, torque-y motor running at slow speeds
- Variable speed
- Has an attachment port
This mixer is the kitchen tool that’s begging to be used in the workshop.
Parts
I’ll split this into 2 categories: Parts to Buy, and Parts to Make.


Parts to Buy
- Abranet: https://amzn.to/2OiThQy
- Squishy Interface Pad ** : https://amzn.to/2OhdeqU
- R4-2RS Bearings: https://amzn.to/2HxVXJE
- Wide Roll of Velcro: https://amzn.to/2YguWj5
- T Bolts: https://amzn.to/2JtPTUk
- T Nuts: https://amzn.to/2TYZjLv
** I bought my pad from SuperGrit here: 5 FOAM H&L INTERFACE PAD (8 HOLES). On Amazon, most seemed to be thin, but I found one on Amazon that looks to be thick like the one I have. Point is, I haven’t tested the Amazon one that I linked to. If in doubt, get the one from SuperGrit and pay the shipping cost. Ideally, you’re looking for a thick, soft pad with hooks on one side, and loops on the other.
Parts to Make
There are 2 parts I recommend you 3D print. But, if you don’t have access to a 3D printer, I think they ought to be easy enough to make out of wood. The tolerances aren’t too important.
3D Printing The Parts
Download 3D Models from: https://www.thingiverse.com/thing:3507813
Making the Parts out of Wood
I realize not everyone has a 3D printer (though you should!) The parts were designed in metric units, but I have put the appropriate imperial units below:
Part #1: Tapered Bearing Holder

This one is a little complex because it is tapered.
- Thru-hole is 5/16″
- Length is 1 1/16″
- OD of Top: 13/16″
- OD of Bottom: 7/8″
- Both recess bearings should be 5/8″ diameter, and 3/16″ deep.
Part #2: Bolt Spacer

This one is simple.
- Thru-hole: 1/4″
- Outer diameter: 7/16″
- Length: 1 3/8″
Assemble The Driveshaft
There’s not much to say here. Just stack the parts together as shown in the picture.


Sand/grind the wings off the t-bolt to make it square and fit in the KitchenAid.


Install the driveshaft:

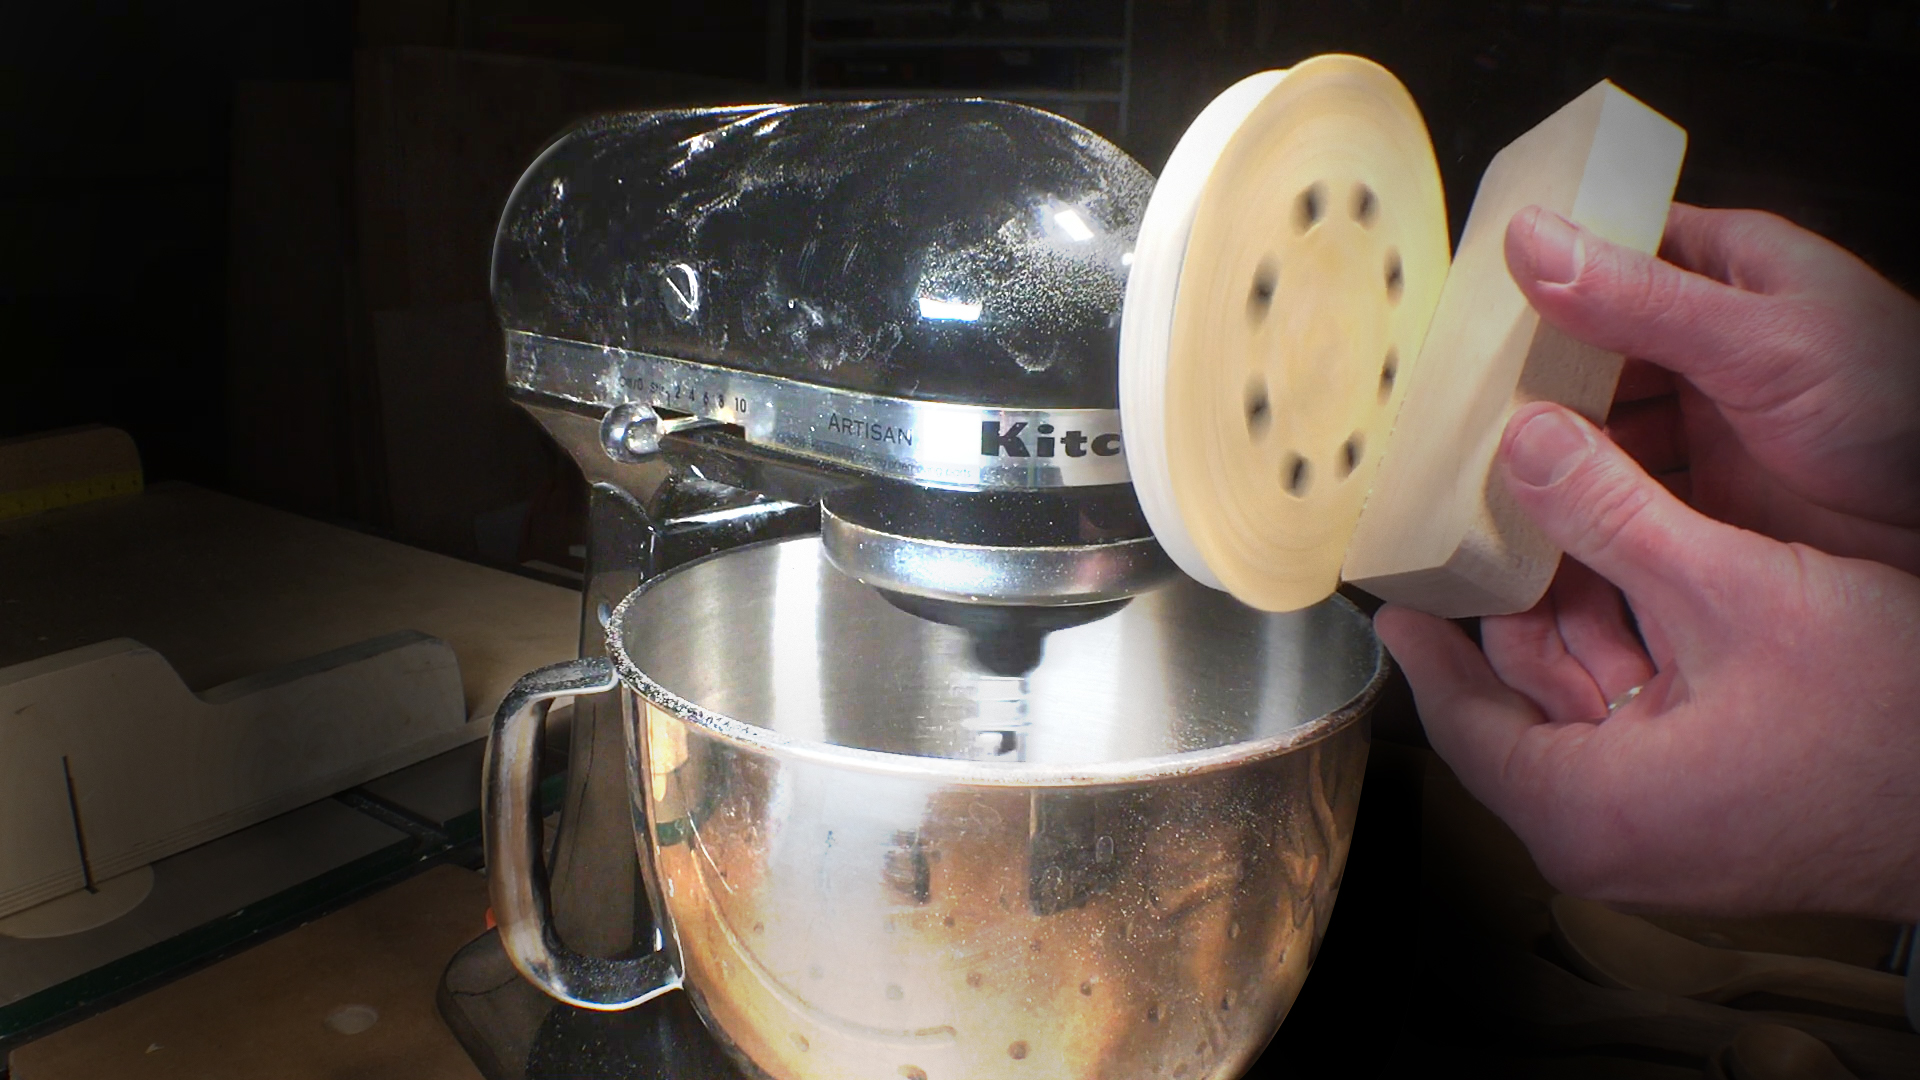
Make the Sanding Plate
Take a 1/2″ piece of Baltic Birch or MDF and cut it down to 5″ x 5″.

Then, mark & punch the center, and use a Forstner bit to create a recess for the T-Nut.


Then, drill a hole for the T-Nut sleeve using a regular bit, and tap in the T-Nut all the way.

Mount it on the mixer, fire it up, and draw a circle a bit less than 5″, then cut it out.

And sand it nice and smooth.

Attach the Velcro
I recommend getting a wide roll of Velcro and using Epoxy to stick it on once and for all. No need to get sticky velcro – in fact, it’s probably best to avoid sticky-back velcro so the epoxy has more texture to adhere to.


Bonus: Create a Foam Core Dust Shield
This is pretty self-explanatory, but poke a hole in a foam core board to keep dust away from the mixer.


Finally, give it a spin!
For ideas, check out my YouTube video if you haven’t yet. On that note, subscribe if you haven’t yet!
Let me know how it goes!
Move it Forward
I’m aware there are a few improvements that can be done – notably in the dust collection department. Please, remix this and make your own variations / improvements! If you come up with anything cool, I’d love to hear about it!