In late 2014, I decided to start a project well beyond my skillset at the time: build a completely custom kitchen island for our basement. I considered it a big challenge and learning opportunity (and reason to justify new shop tools.)
Wood species:
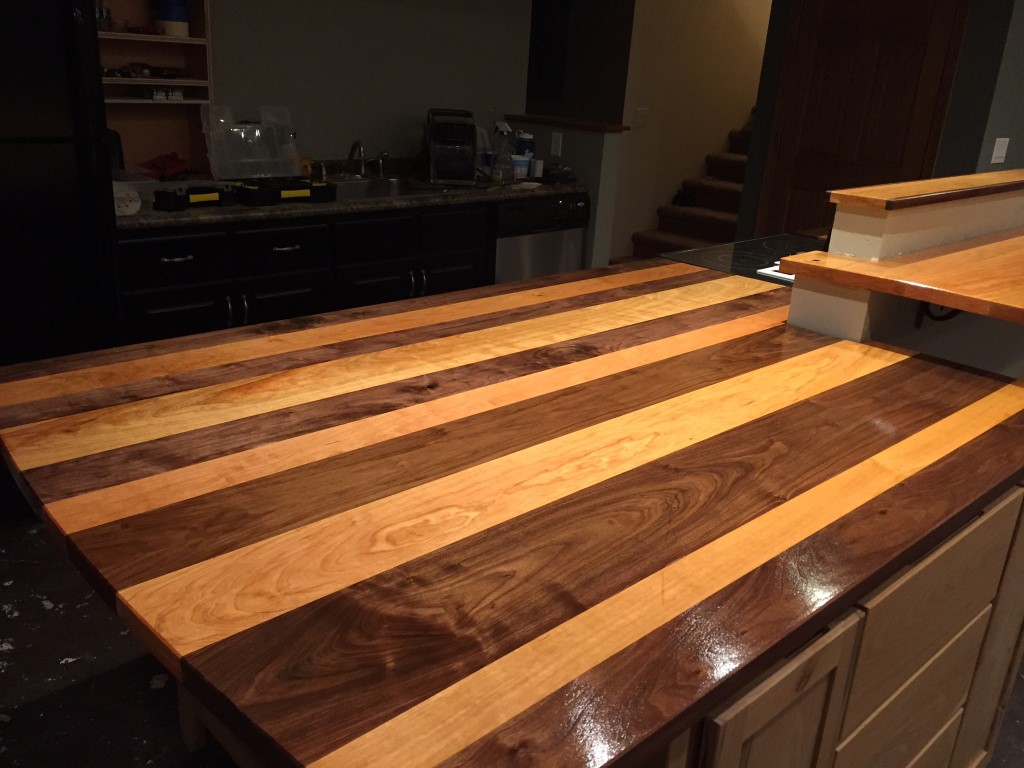
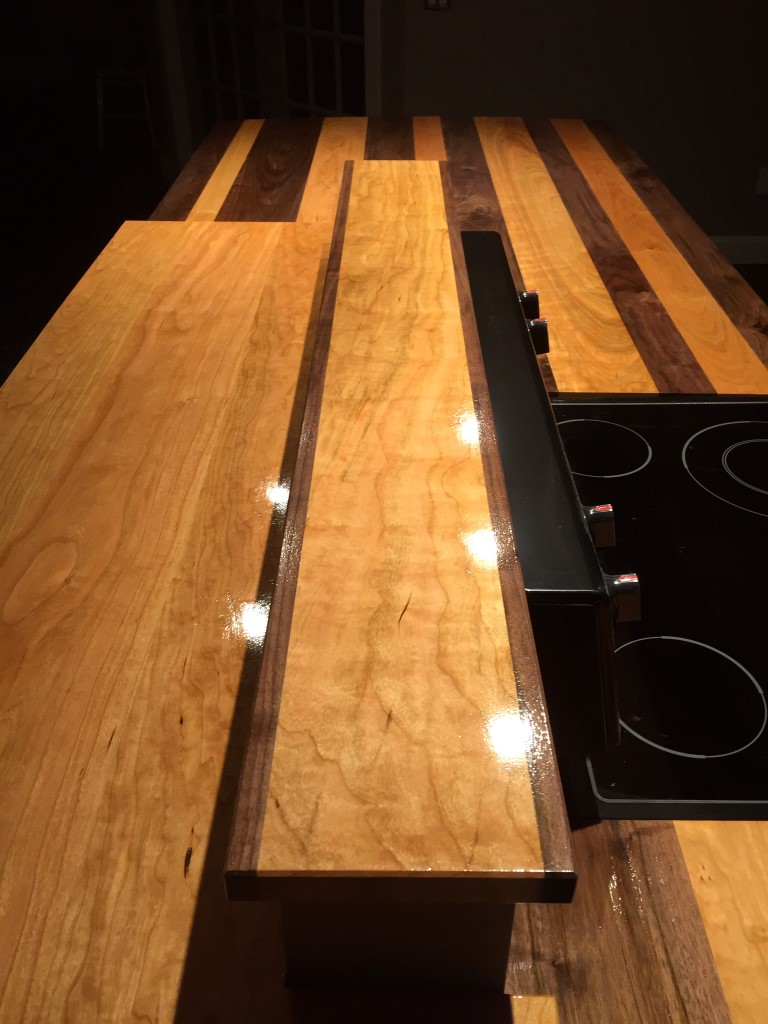
- Top: Cherry & Walnut
- Doors and Drawers: Sassafras
Preparation / Planning
Trick # 1 – Little Access to Basement
People lived in the basement at the time, so I had to do the design/planning work without going downstairs much. So, I went down once to get some measurements, then drew up our whole basement in Sketchup, and did the design/planning/building upstairs.
Trick # 2 – Load-bearing support beams in the way
We had 2 support poles that were going to be ridiculous to work around. So, we hired a builder to come in and advise us how to redirect the load.
I mapped out the upstairs in Sketchup as well, in order to better understand load placement.
The design is custom. What separates this from most range-containing islands is that this will accommodate a range with the knobs on the back. Most islands built for ovens have the knobs in the front, and are therefore counter-height across the whole island.


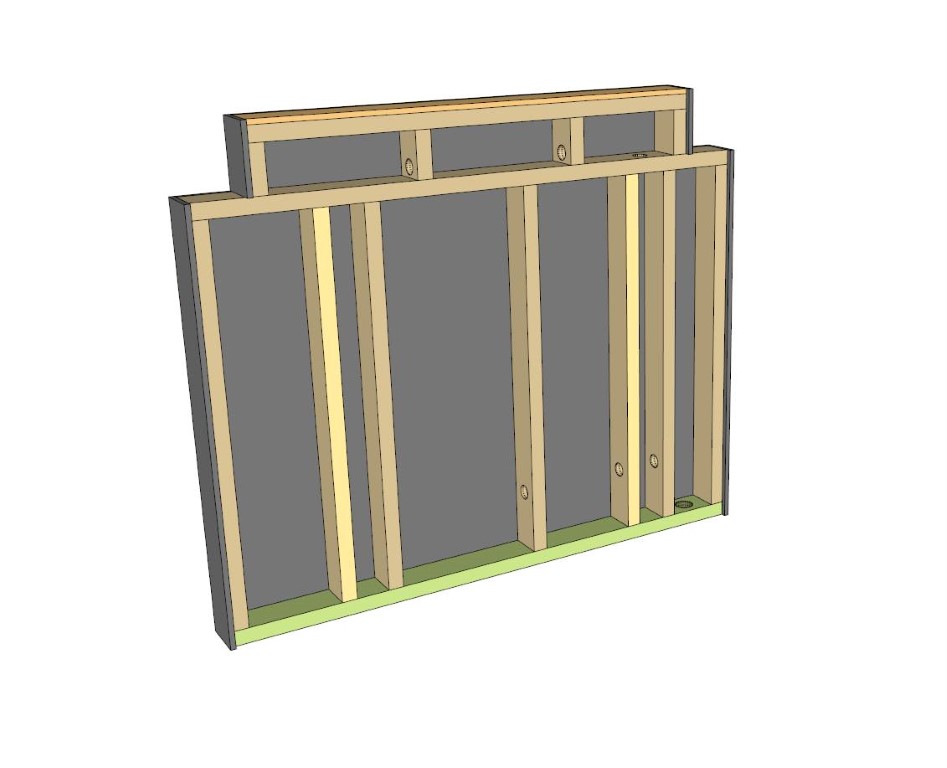


Wall Construction
Any weight placed on the bar-top area would be pulling that wall outward away from the oven. So, I used hidden supports tucked on the sides of the oven to keep the wall vertical even if excessive weight was placed on the bar.
There are 5 circuits in this island. 1 for lighting, 1 for the oven, and 3 for receptacles. Overkill? Maybe. But, we expect to be hosting Raclette parties around this island in the future. It’s not so much overkill as it is excessive preparation.


Island Build


Island Finishing


Complete