

We recently made some cornhole and washer toss sets with portability in mind. Here are the design considerations:
- Lightweight
- Minimal space for transport and storage
- Make both sides out of 1 sheet of 5’x5′ 1/2″ Baltic Birch plywood
- Bonus: Also make washer toss sets to nest inside
Here’s a quick video tour:
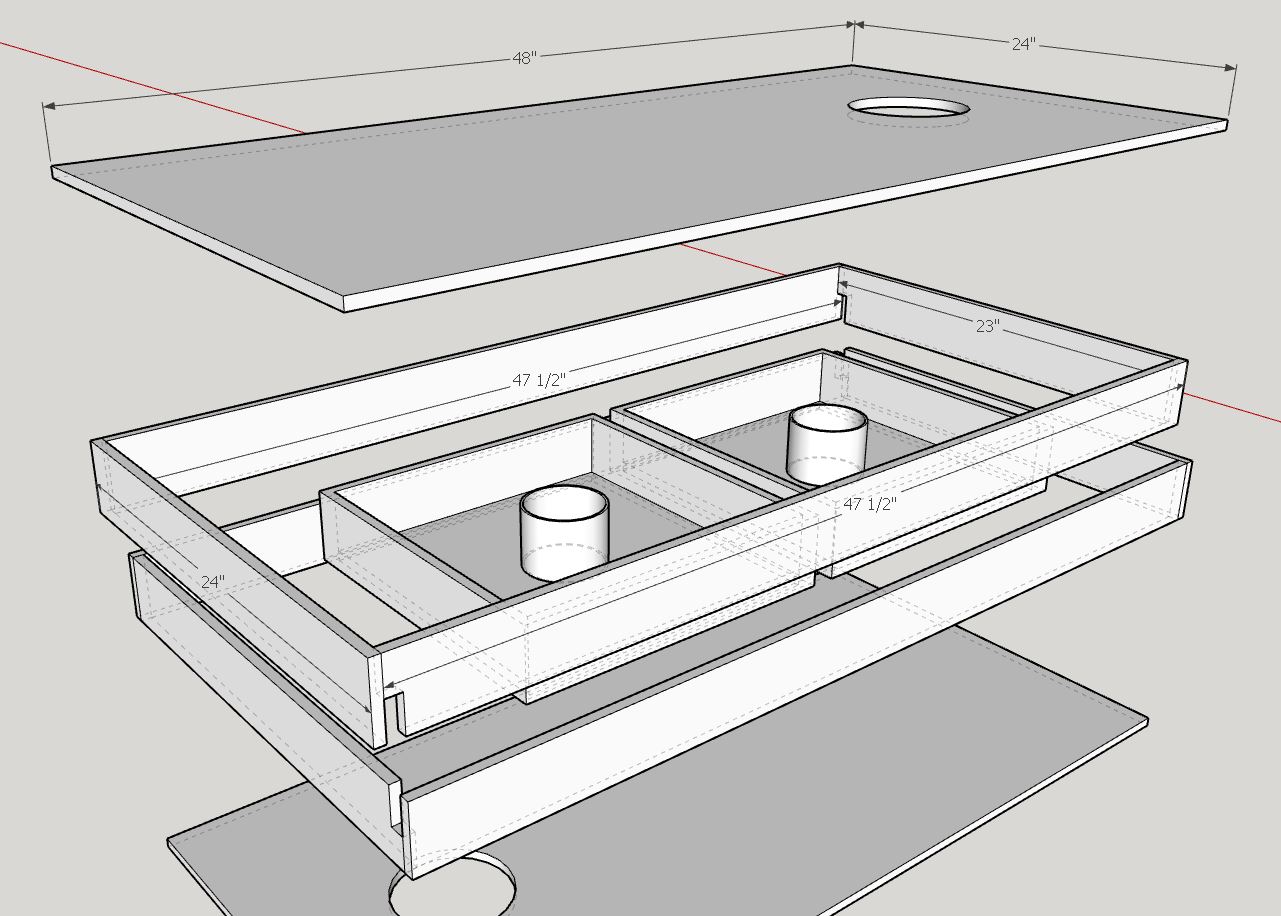
SketchUp of the basics:
Cutlist Diagrams:
Download the Cornhole and Washer Toss Cutlist [PDF]
BAGS UPDATE!!
After our corn bags got nasty, we finally bought some proper weather-resistant bags (regulation size/weight of course!). We’ve been using them the past 3 years and they’re still perfect.

Cornhole
1/2″ 60″x60″ Baltic Birch Plywood

Cornhole Cut Notes
- Each set has 5 main pieces
- 1 top
- 2 side rails, both 47 1/2″ long (only 1 is notched)
- 2 end rails, 23″ and 24″ (only 1 is notched…the 23″)
- After cutting all 10 pieces (2 tops and 8 rails into rectangles, pull aside the following rails and give them notches:
- 2x 23″ rails
- 2x 47 1/2″ rails
Cornhole Tips & Tricks
Watch the addendum video for more info about these:
- Weak points: there are a couple notable weak points that can be triggered by de-nesting them unequally. This can be prevented by adding angles near the notches.
- Play: play can be added by making the notches wider than 1/2″, as well as angling them.
- Hole position: Be strategic about hole placement so that de-nesting is easy.
Washer Toss
1/4″ 60″x60″ Baltic Birch plywood
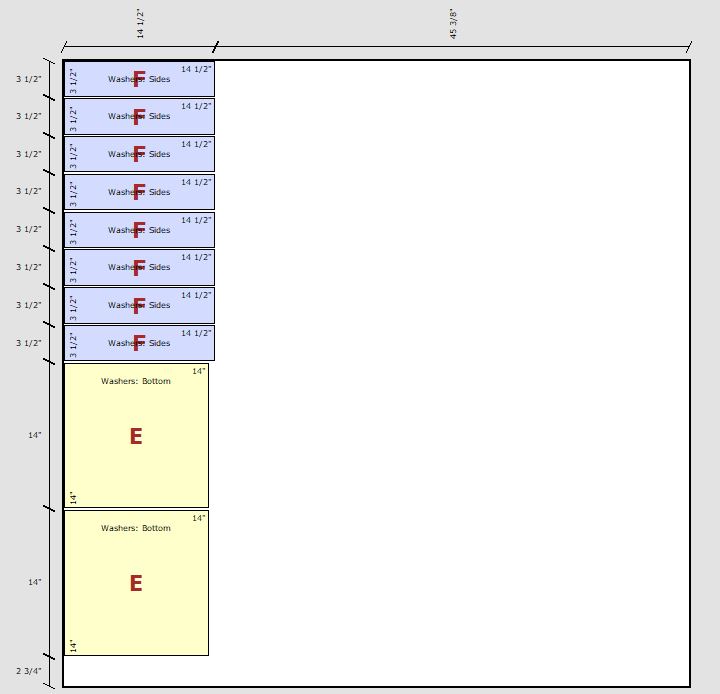
Washer Cut Notes
- The sides are all uniform in length and slightly longer than necessary. This works if you align them to each extend past the start of the next side. Then, once the glue dries, use a trim router to trim off the extra. (Reason for this: to avoid accounting for variances the thickness of 1/4″ plywood.
Washer Tips & Tricks
- Cork is wood. Use wood glue to glue wood to wood. ?
- Assembly is done with Titebond III wood glue and narrow crown staples.
- PVC attachment:
- Measure the inner diameter of the PVC.
- Make a plywood circle that matches that diameter (or a bit smaller), then attach plywood circle to the base
- Use foaming gorilla glue around plywood circle where PVC will fit
- Wear gloves!
- Slide PVC onto disc immediately after applying gorilla glue
- Put a block of wood on top of the PVC to hold it down while the gorilla glue foams up.
- We used 4″ schedule 40 PVC, sliced up on the band saw.